In this blog post, we will explain step by step how to connect to Microsoft Dynamics 365 CRM OData with Auth2 authentication type via the Azure and the Microsoft Office portal.
Azure Portal
In order to configure the below steps you need to have an Azure admin user account.
- Log in to portal.azure.com
- Go to Azure Active Directory
- Go to App Registrations
- Click + New registration
- Name = [your App Name] (Example: RapidiCRMApp)
- [Section] Supported account types > Select: ... Single tenant
- Click Register
- Within the same screen
- On the API permissions page for your app, click the 'Add a Permission' button.
- Make sure the Microsoft APIs tab is selected. In the Commonly Used Microsoft APIs section, click on Dynamics CRM and select Delegated Permissions.
- Ensure that the following permissions are checked:
- User_impersonation (Access Common Data Service as organization users)
- Click the Add Permissions button.
- You will be returned to the previous screen, and there you have to click Grant Admin Consent for...
- Within the same screen, From the Certificates & Secrets page, in the Client Secrets section, choose New client secret:
- Type a key description (for instance app secret),
- Select a key duration of either In 1 year, In 2 years, or Never Expires.
- When you press the 'Add' button, the key value will be (only once) displayed, copy, and save the value in a safe location.
- Keep the Application Id and the Application secret in a safe location, we will need these later.
Microsoft Office Portal
1. Log in to the Power Platform Admin Center portal, e.g.: https://admin.powerplatform.microsoft.com
2. From the left Menu, choose Environments
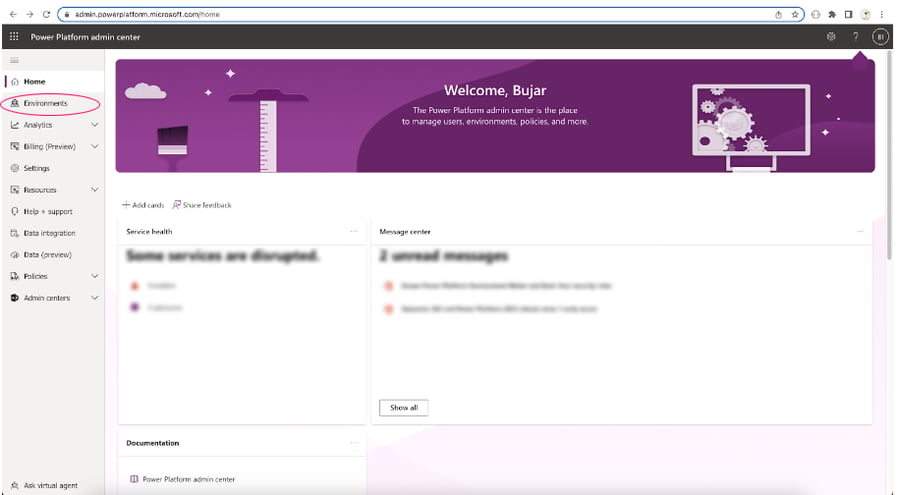
3. Choose your CRM Environment (for example rapidionline.com default environment)
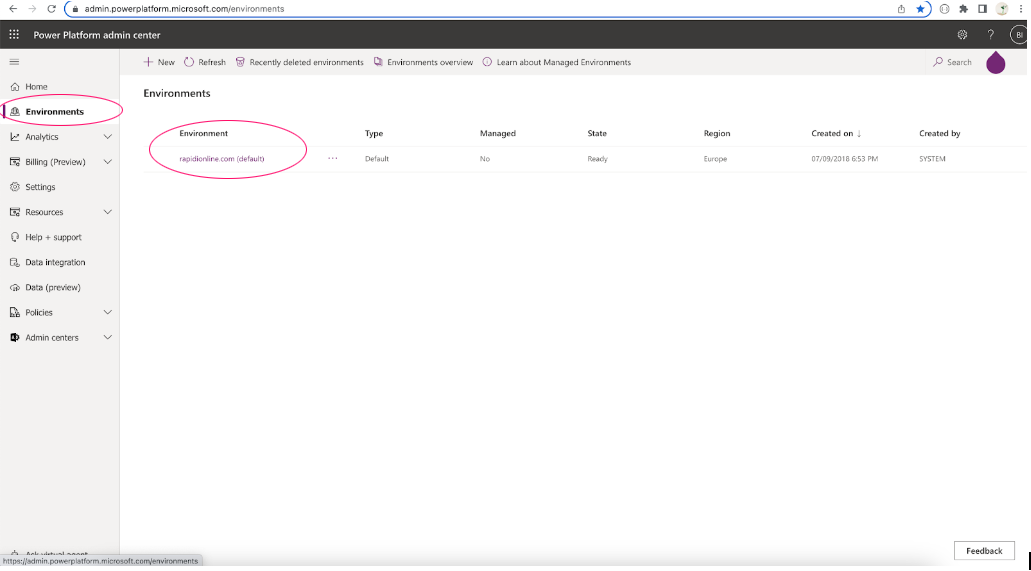
4. Click to open the CRM Environment
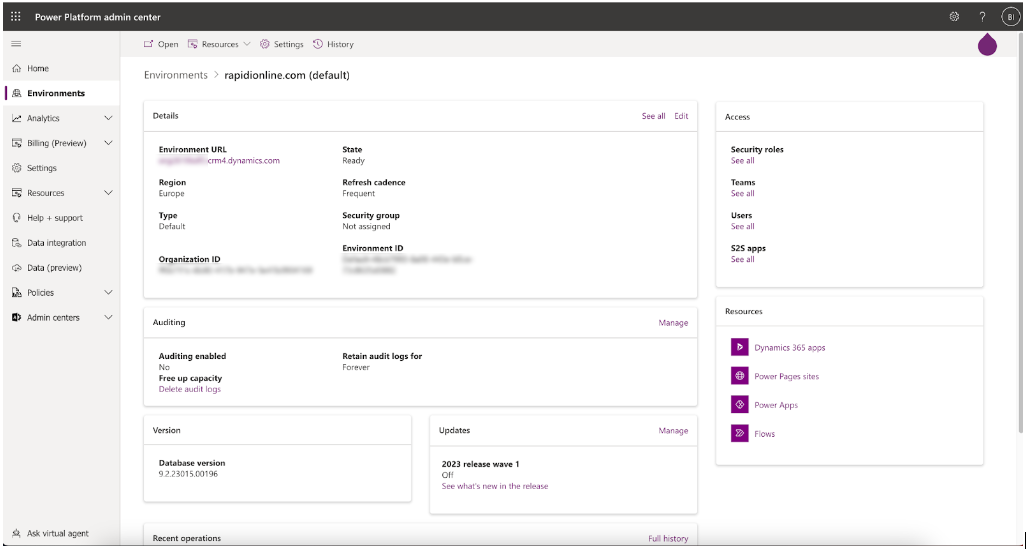
5. Choose Settings located at the top of the page and then
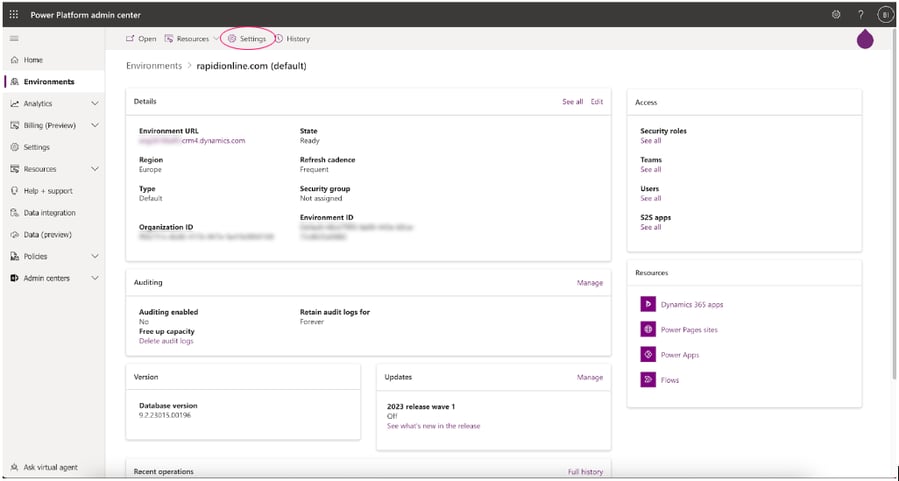
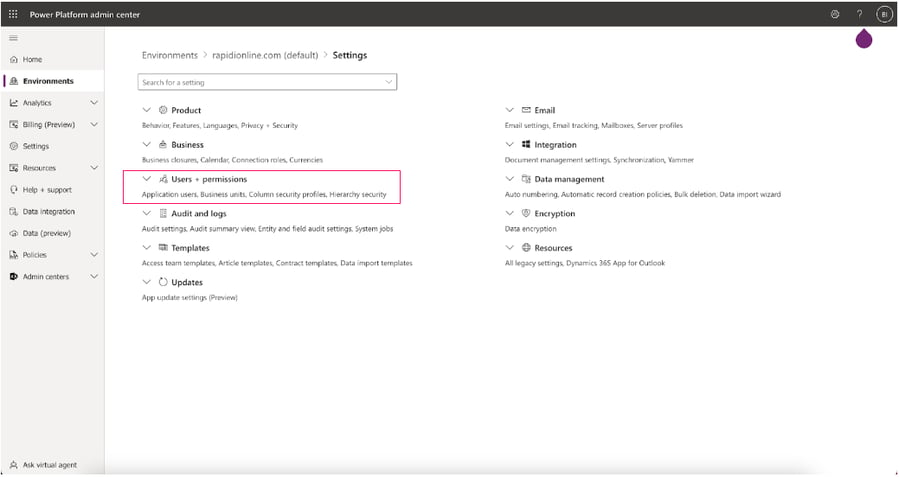
6. Choose Users + Permissions and navigate to Application users
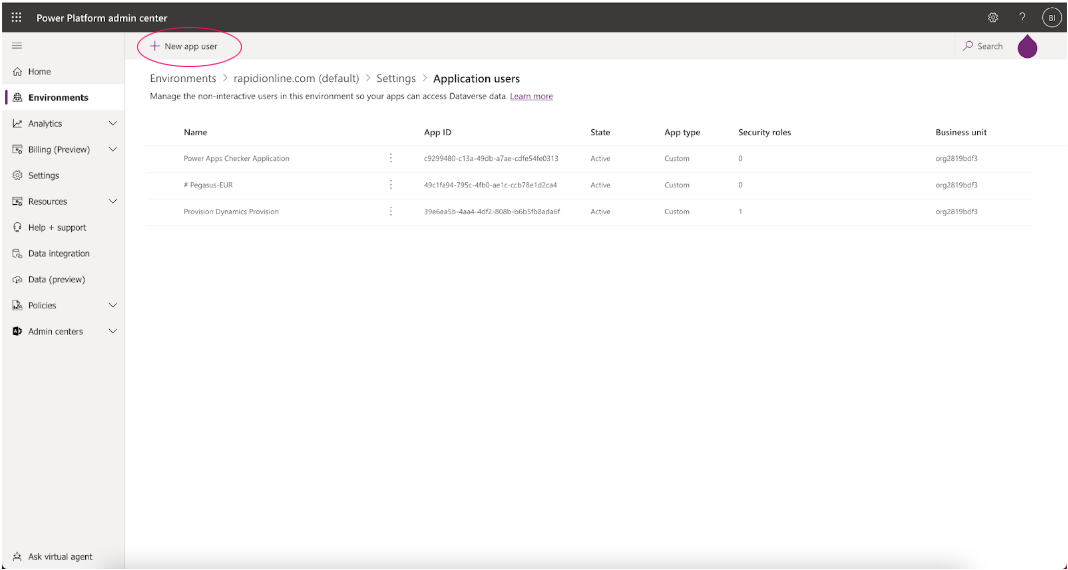
7. Choose +New app user located at the top.
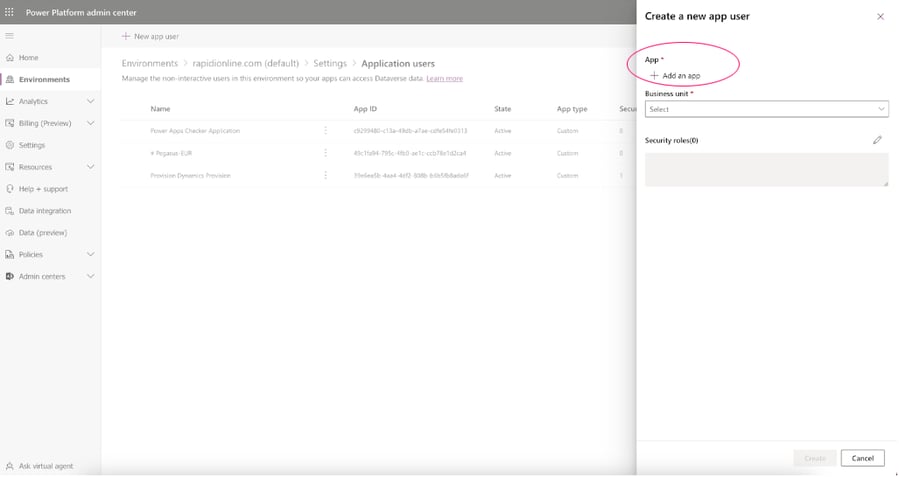
8. A side window will open. On this side, window Click +Add an app then choose the app id created in Azure (Check the first step of this document) and click Add
9. Choose the Business Unit from the options below (usually it is the CRM org)
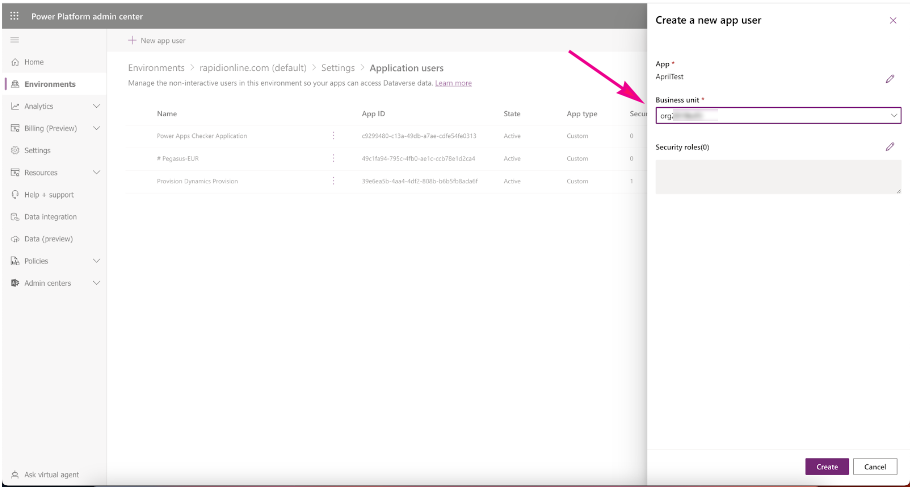
10. Click on the Pencil Icon on the right to add a Security Role to the Application for the selected Business Unit then click Save and finally click Create
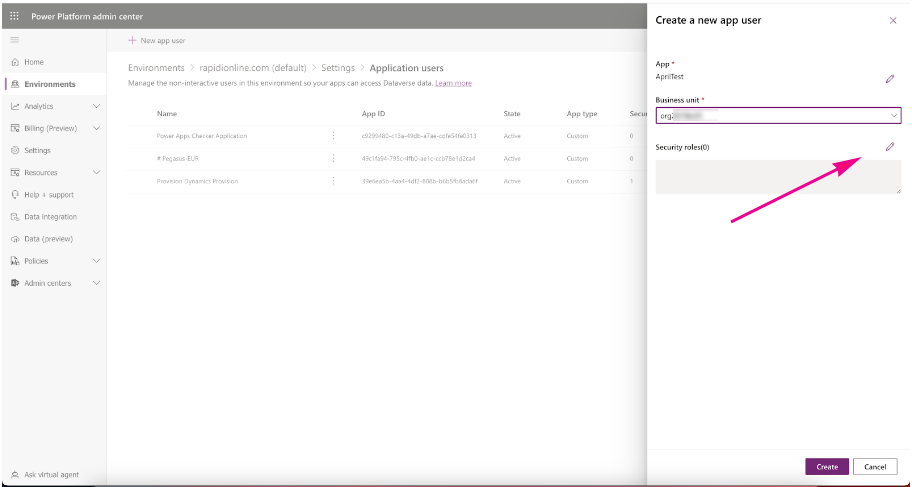
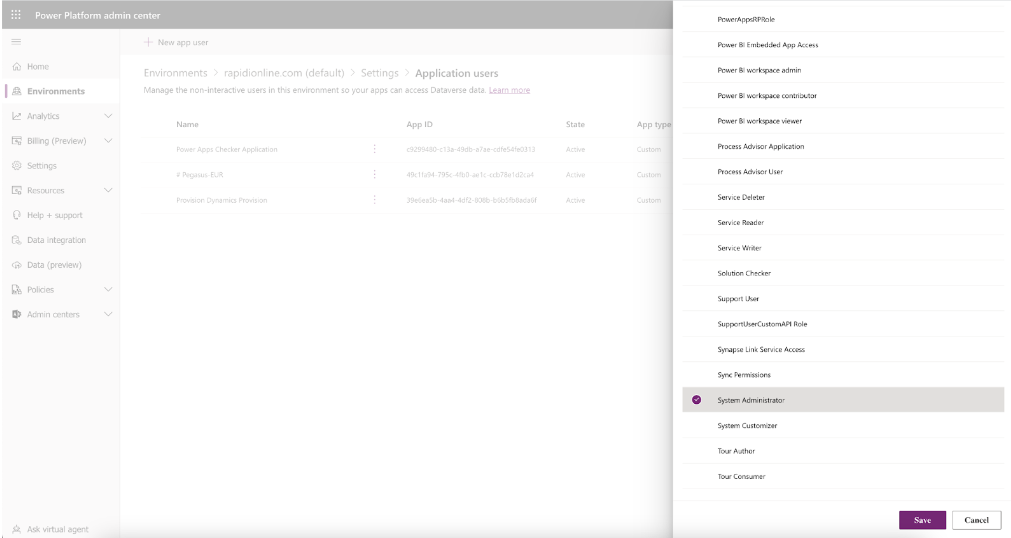
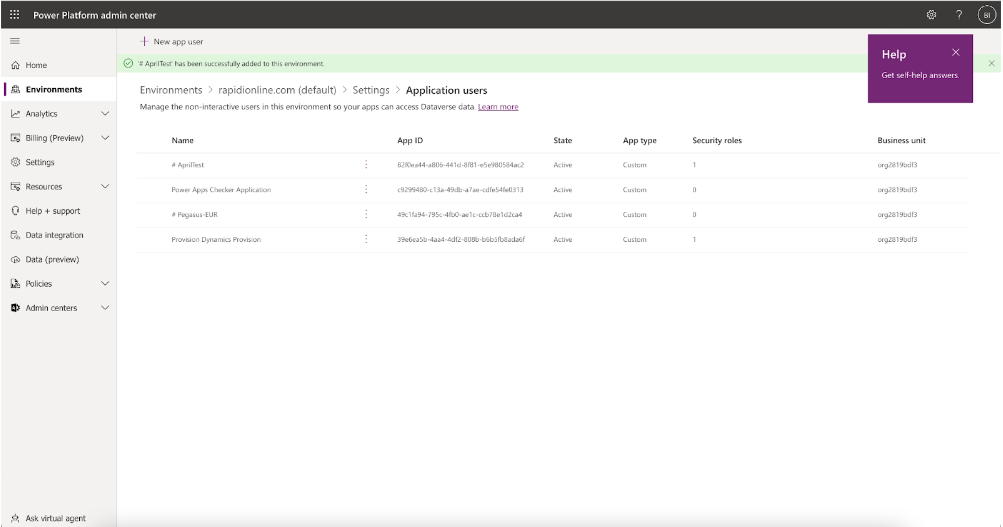
11. Congratulations, you have completed the setup.
Configuration in Rapidi
- Login to MyRapidi. Navigate to the Connections page and create a new connection of type CRMODATA.
The fields of the CRMODATA Connection are as follows:
- Code: auto-populated
- Description: - type a proper description (Example: Connection to CRM TEST Environment)
- Authentication Type: Oauth2 (Azure AD)
- Server Connect: Here paste the Url from the CRM environment, for example, https://domainname.crm4.dynamics.com/xxxxx
Note that the URL from the client could be larger but you’ll need to chop it until ‘dynamics.com’ and then add ‘/api/data/v9.0/accounts’. The full server connect URL should look like this: https://domainname.crm4.dynamics.com/api/data/v9.0/accounts
- Company: Enter Company Name (or leave it blank)
- User Id: This is the Azure application Id (that was created in the first step)
- Password: This is the client secret/application secret (created on the first step)
- Domain: This is the tenant id of the customer (can be found under Azure)
- Resource: https://domainname.crm4.dynamics.com/
- Metadata URL: copy from the Server Connect and remove the last /accounts and add /$metadata. The full metadata URL should look like this:
https://domainname.crm4.dynamics.com/api/data/v9.0/$metadata
- Use SSL: Mark it as True
About the author
Beate Thomsen, Co-founder & Product Design
As Co-Founder of the Rapidi Data Integration platform, Beate has spent over 2 decades on its development, building it around her motto: 'keep it simple, functional yet beautiful.' She holds a Master Degree in IT, Management and Communication and always sees herself as neverending business development entrepreneur with the passion for helping businesses transform, grow and streamline their business operations through Rapidi.


